Saturday, April 27, 2019

Walkthrough Video

A small number of people have asked me how to edit video, so here we go! Again, I'm sorry it's more of a walkthrough than a tutorial or guide, but it beats having nothing.

The walkthrough is available on mega.nz: WALKTHROUGH VIDEO
Duration: 16 minutes
Size: 225MB
Or you can find all the walkthroughs here.

Description: I go over rotoscoping and the process I use for it. Then I go over using liquify on video and how to use the offset property on the liquify effect to help out. Then I got back and show how to use the Reshape Effect instead. Then I use the Jiggle Portion of the Jiggle and Grow script to add jiggles. I do this twice, using both modes: Force/Spring and Speed/Amount.

Below are the results.


• Source: Nicole Kopchak (BoutineLA) [reddit]

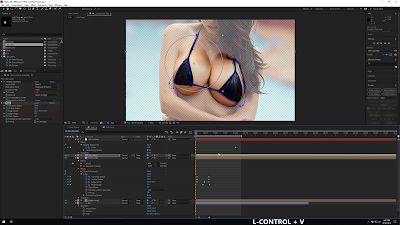
This is the expression I used on the null layer to get the average point of the mask:

path = thisComp.layer("Chest2").mask("Cutout").maskPath;
numAnchorPoints = 15;
sum = [0,0];
for(x = 0; x < numAnchorPoints; x++){sum = sum+path.points()[x];}
sum / numAnchorPoints;
You will need to replace Chest2 with the layer's name that has the mask and also Cutout with the mask's name (probably Mask 1).
Lastly, change the numAnchorPoints to the number of anchor points your mask has, mine had 15.
Note:That expression will only work on newer version of AE, I believe somewhere around CC 2017/2018 because they added the ability for expressions to be able to look at mask paths. So if you've followed the above and it still fails, you'll need to use a tracker point. If you have to use a tracker, you'll want to pickwhip the tracker's position instead.
Friday, April 26, 2019

Walkthrough 1

Despite it's name, Walkthrough 1 isn't the easiest, it was just the first. The "Walkthrough Liquify" is the easiest. I realized this one was a bit harder than I wanted after I completed it, so I went back and made the Liquify walkthrough.

The walkthrough is available on mega.nz: WALKTHROUGH 1
Duration: 25 minutes
Size: 225MB
Or you can find all the walkthroughs here.

Description: The first thing I do here is color correct the image in Photoshop. Also, I add additional layers to the psd file so the breasts have more breathing room in the animation. In After Effects I use Reshape to control the size. I briefly show how to do this without the Jiggle and Grow script, but then also show how to use the script.
In addition, I then go over how to add shadows, which is where most of the time is spent. At the very end, I show exporting to an mp4 file and creating a gif.

Below are the results.


I'm sorry it's not really a tutorial, but it's better than nothing. It was the first one I did so I think I improved a tiny bit with the other two.

Wednesday, April 24, 2019

Walkthrough Using Liquify

Been away for awhile, things change and take time to get used to. But over the passed couple weeks I've been making walkthroughs for the anyone to use. They're not the greatest in the world, but it's something.

The walkthrough is available on mega.nz: WALKTHROUGH LIQUIFY
Duration: 12 minutes
Size: 120MB
Or you can find all the walkthroughs here.

Description: This is the easiest way to make breast expansion morphs in After Effects. I make 3 different levels, just Liquify, Liquify with more effects, and then one that uses multiple layers/masks and Liquify effects. This is just default After Effects, so no script or anything complicated. This will even likely work with the "freely" available version of After Effects from CS2 - except the mask feathering points, but that's not too bad.

Below are the results.


I apologize for the text-to-speech, but it's not too bad. There will be 2 more walkthroughs released shortly.

Go forth and please make things.